
Node.js and its package manager, npm (Node Package Manager), are indispensable tools for modern web development. Node.js is an open-source, cross-platform JavaScript runtime environment that allows developers to build server-side and networking applications. npm, on the other hand, is the default package manager for Node.js, allowing developers to install, share, and distribute code.
Let’s look into different ways and processes of installing Node.js and npm on your macOS device in 2023.
Method 1: Install with Homebrew
Homebrew is a popular package manager for macOS, which makes it easy to install a variety of software packages. If you haven’t installed Homebrew yet, you can do so by running the following command in your terminal:
cimba:~ $ /bin/bash -c "$(curl -fsSL https://raw.githubusercontent.com/Homebrew/install/HEAD/install.sh)"Once Homebrew is installed, you can install Node.js and npm by running:
cimba:~ $ brew install nodeThis will install the latest available versions of Node.js and npm.
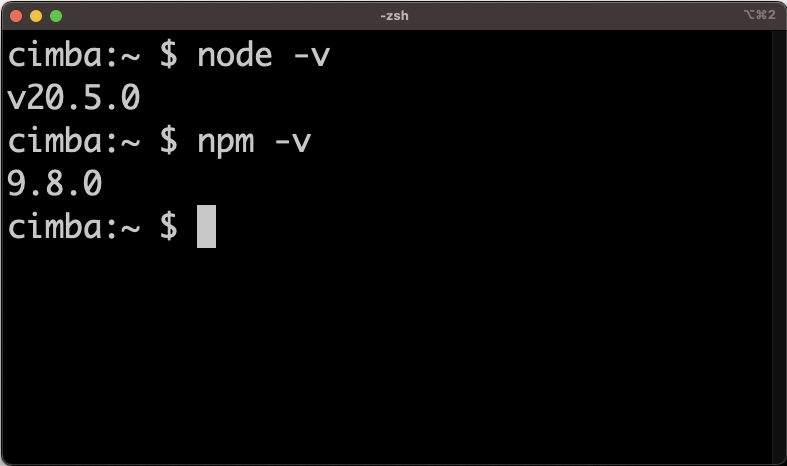
To verify the installation, use these commands:
cimba:~ $ node -vcimba:~ $ npm -vMethod 2: Install with Node Version Manager (NVM)
NVM is a version manager for Node.js, designed to allow developers to install and switch between multiple versions of Node.js and npm easily.
First, install NVM using curl or wget. Here we’ll use curl:
cimba:~ $ curl -o- https://raw.githubusercontent.com/nvm-sh/nvm/v0.39.3/install.sh | bashThe version of NVM may change, so make sure you’re installing the latest version by visiting the NVM GitHub page.
Close your terminal and open a new one, then verify that NVM is installed with:
cimba:~ $ nvm --versionNow you can install Node.js. To install the latest version, use:
cimba:~ $ nvm install nodeAgain, verify the installation of Node.js and npm with:
cimba:~ $ node -vcimba:~ $ npm -vWith NVM, you can install multiple versions of Node.js and switch between them as needed. For example, to install a specific version of Node.js, use nvm install <version> and to switch between installed versions, use nvm use <version>.
Method 3: Direct Download
If you prefer not to use a package manager, you can download Node.js directly from the official website.
- Visit the Node.js download page at https://nodejs.org/en/download/.
- Choose the macOS Installer (.pkg) option.
- Once downloaded, double-click the .pkg file and follow the instructions to install Node.js and npm.
- After installation, verify that it was installed correctly by checking the versions in your terminal:
cimba:~ $ node -vcimba:~ $ npm -vConclusion
Congratulations! You now have Node.js and npm installed on your macOS device. Depending on your preference, you can use Homebrew for a straightforward installation, NVM for flexible version management, or a direct download. With these tools installed, you’re now ready to dive into the world of Node.js development.

Leave a Reply
You must be logged in to post a comment.